How to set up Norgate Data for Zipline Reloaded


How to set up Norgate Data for Zipline Reloaded
Norgate is a premium data provider that offers survivorship-bias–free historical data for equities, ETFs, and futures with high data quality and comprehensive corporate action adjustments. Its Zipline Reloaded integration delivers clean, point-in-time datasets optimized for professional backtesting. The service includes delisted securities, accurate index membership histories, and consistent symbol management, which are critical for realistic simulations. It is designed for researchers who need reliable, production-grade data rather than free or prototype-level alternatives.
Pros
- Provides survivorship-bias–free datasets with full delisted security coverage.
- Includes stocks, individual futures, forex, and economic time series
- Offers accurate corporate actions and point-in-time index membership essential for robust factor testing.
- Integrates tightly with Zipline Reloaded for high-fidelity backtests.
Cons
- Only works on Windows machines.
- Requires a paid subscription, increasing research costs.
- Ingestion pipelines are more complex than the free bundle and require ongoing updates.
- Covers only specific markets and asset classes, which may not meet all research needs.
Instructions for setting up:
If you need help, the Norgate Data website has extensive instructions and documentation for installation, configuration, and setup.
1. Head over to the Norgate Data subscription page: https://norgatedata.com/subscribe/subscribe.php
2. Select Zipline (Windows) and complete the registration process.
3. Select your preferred currency, six or twelve-month subscription length, the Platinum US Stocks Data package, and the Silver Futures Data package (optional).
4. Download and install the NDU and keep the default directories.
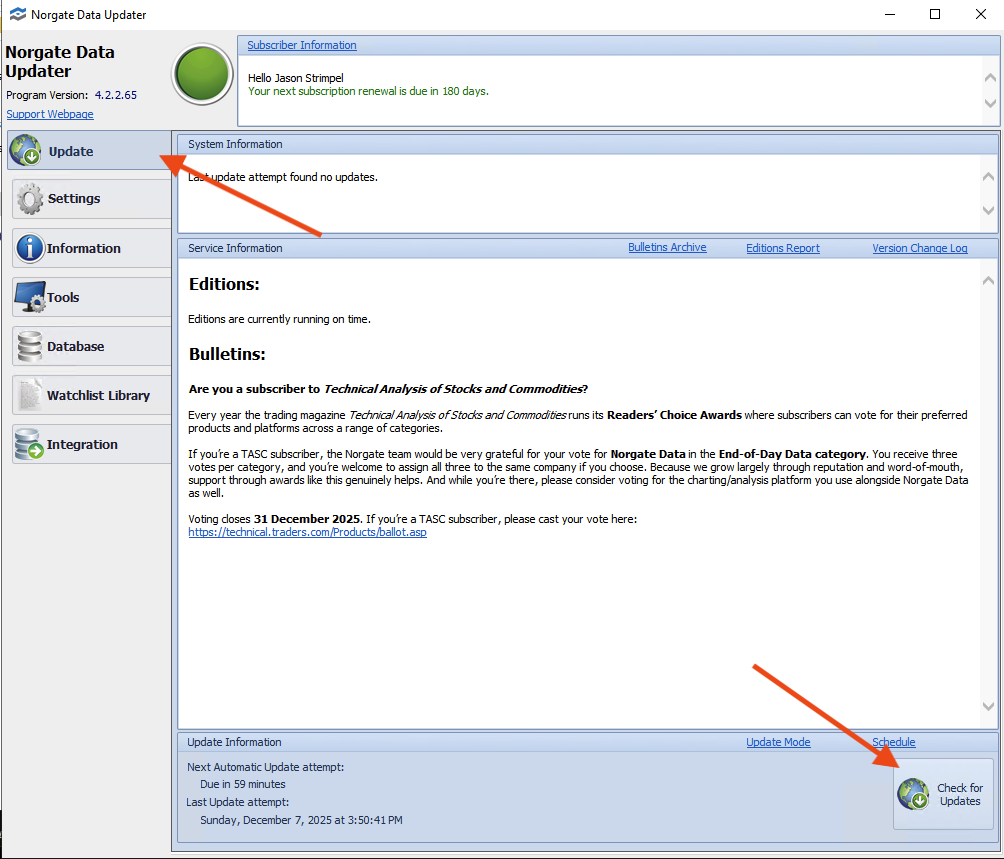
5. Once it's installed, open up the NDU and go to the Update tab on the left. Click Check for Updates in the bottom right corner to kick up the database updates.
6. Once complete, click Watchlist Library on the left menu and click Create Dynamic.

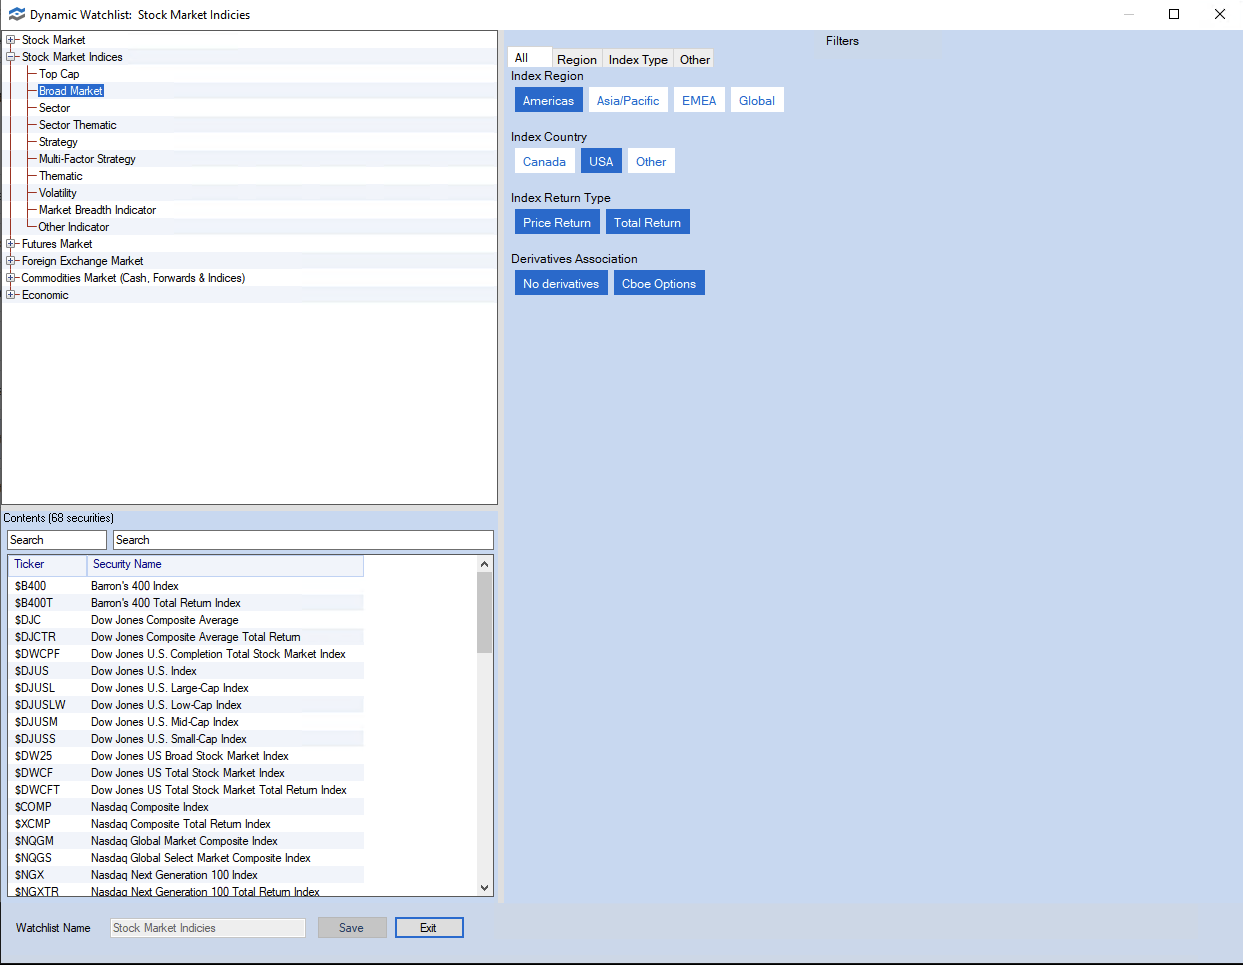
7. On the screen that appears, click Stock Market and select the Filters as they appear in the image. Enter the watchlist name Stock Market in the bottom left corner and click save.

8. Create a new Dynamic Watchlist and name it Stock Market Indicies by selecting Broad Market and selecting the Filters as they appear in the image.
9. Back on the Watchlist Library, scroll to the bottom and check the boxes next to the two watchlists you just created, Stock Market and Stock Market Indicies. Then click the Combine button.
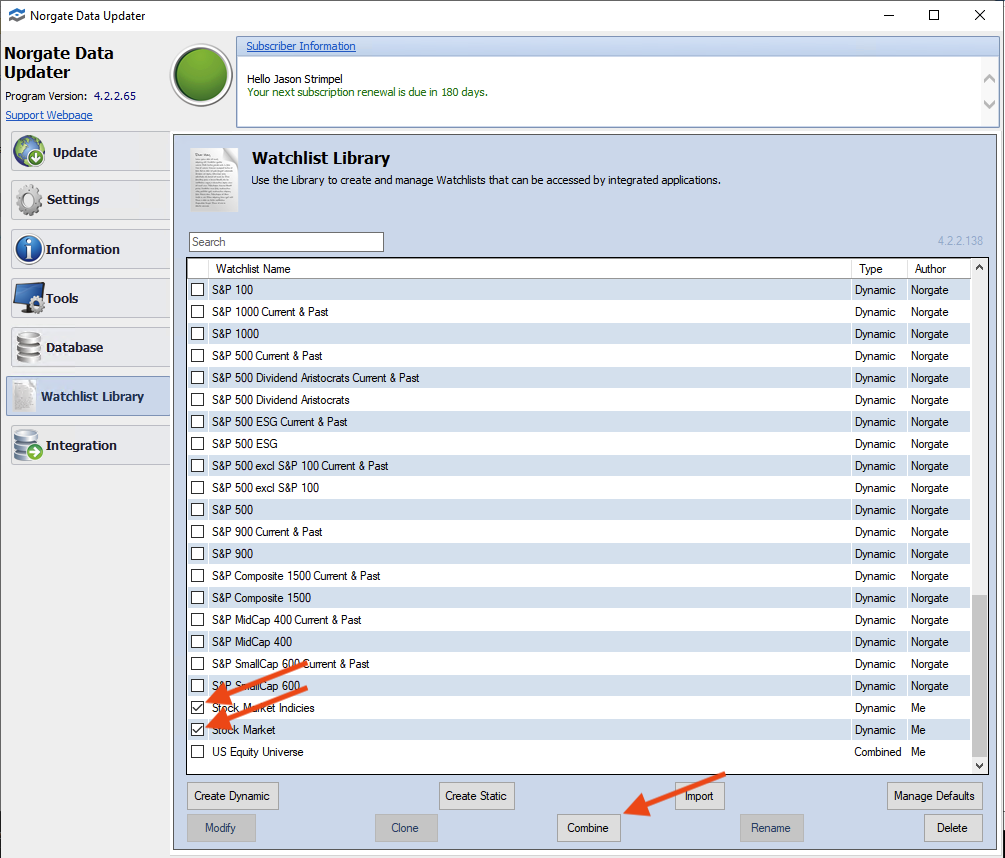
10. On the pop-up that appears, enter US Equity Universe as the name and click Ok.

One of the major benefits of Norgate Data is that you can create any number of watchlists and use them to create Zipline Bundles for your backtests. This helps you create a realistic trading universe.
Patching Zipline Reloaded libraries
There are two easy code modifications to make.
Patch 1: Update Exchange Calendars to allow trading from 1990
Navigate to the exchange_calendars folder within site packages. This is typically located at C:\\Users\\<your username>\\anaconda3\\envs\\alpha-lab\\Lib\\site-packages\\exchange_calendars.
Edit exchange_calendar.py
Go to line 58 and change:
to the following:
Patch 2: Additional patch to workaround "YYYY-mm-dd HH:mm:ss+00:00 is not a trading minute"
Navigate to the zipline folder within site packages. This is typically located at C:\\Users\\<your username>\\anaconda3\\envs\\alpha-lab\\Lib\\site-packages\\zipline.
Navigate to the utils subfolder and edit the file events.py
Locate the code (around line 519)
    def should_trigger(self, dt):
        value = self.cal.minute_to_session(dt, direction="none").value
        return value in self.execution_period_values
Change it to:
    def should_trigger(self, dt):
        value = self.cal.minute_to_session(dt, direction="previous").value
        return value in self.execution_period_values
Create Your Extension File for Custom Bundles
Navigate to your Zipline local settings folder. This is typically located at C:\\Users\\<your username>\\.zipline. (Note: This is NOT the extension.py file inside the anaconda3\\envs\\lib\\site-packages\\zipline directory.)
from zipline_norgatedata import (
    register_norgatedata_equities_bundle,
    register_norgatedata_futures_bundle
)

# S&P 500 Bundle for backtesting including all current & past
# constituents back to 1990 and the S&P 500 Total Return index
# (useful for benchmarking and/or index trend filtering)
register_norgatedata_equities_bundle(
    bundlename = 'norgatedata-us-equity-universe',  # Whatever you want
    watchlists = ['US Equity Universe'],  # Name of the NDU watchlist
    start_session = '1990-01-01',  # No earlier than 1990-01-01
)
Then, to ingest the bundle:
zipline ingest -b norgatedata-us-equity-universe